Practical Deep Learning for Coders

fastai courses 2022
fastai
Published

October 17, 2022

Source of inspiration

Many sources about that, pointing all to https://course.fast.ai/

This is version 5 of this course.

Setup local conda environment for fastai

conda environment

!cat ~/_conda_env/fastai.txt
conda create -n fastai python=3.9
conda activate fastai
conda install ipykernel
python -m ipykernel install --user --name=fastai
conda install -c fastchan fastai nbdev
pip install gradio
pip install kaggle


# update
conda activate fastai
conda update -c fastchan fastai nbdev
pip install -U gradio 

setup kaggle

And I have to setup kaggle locally:

  • [already done] pip install kaggle inside my fastai env
  • create a token from my kaggle profile page
  • move this kaggle.json into ~/.kaggle/kaggle.json
  • chmod 600 /home/guillaume/.kaggle/kaggle.json

image.png

get materials from github

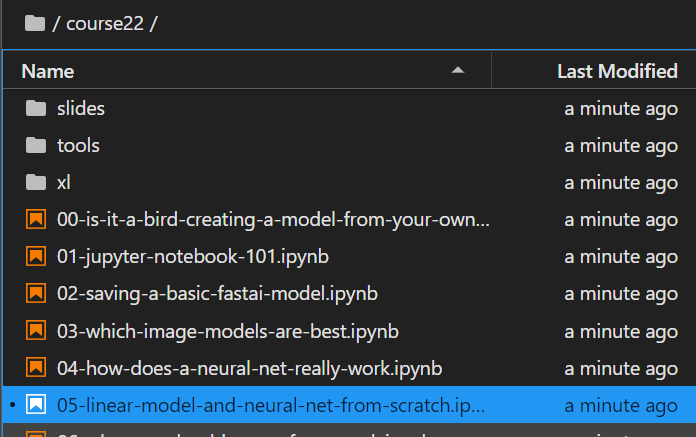
Github fastai/course22 is where you’ll find the notebooks, slides, and spreadsheets for the 2022 edition of Practical Deep Learning for Coders. we can get a local version from .

cd ~/git
git clone https://github.com/fastai/course22.git 
cd course22

image.png

Lesson 1 - Getting started

image.png

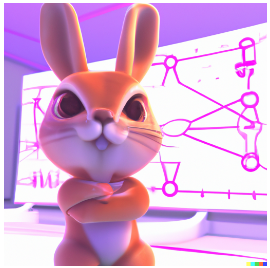
In this lesson you’re going to hit the ground running – in the first five minutes you’ll see a complete end to end example of training and using a model that’s so advanced it was considered at the cutting edge of research capabilities in 2015.
So, let’s get started!

https://course.fast.ai/Lessons/lesson1.html

Deep learning introduction

image.png

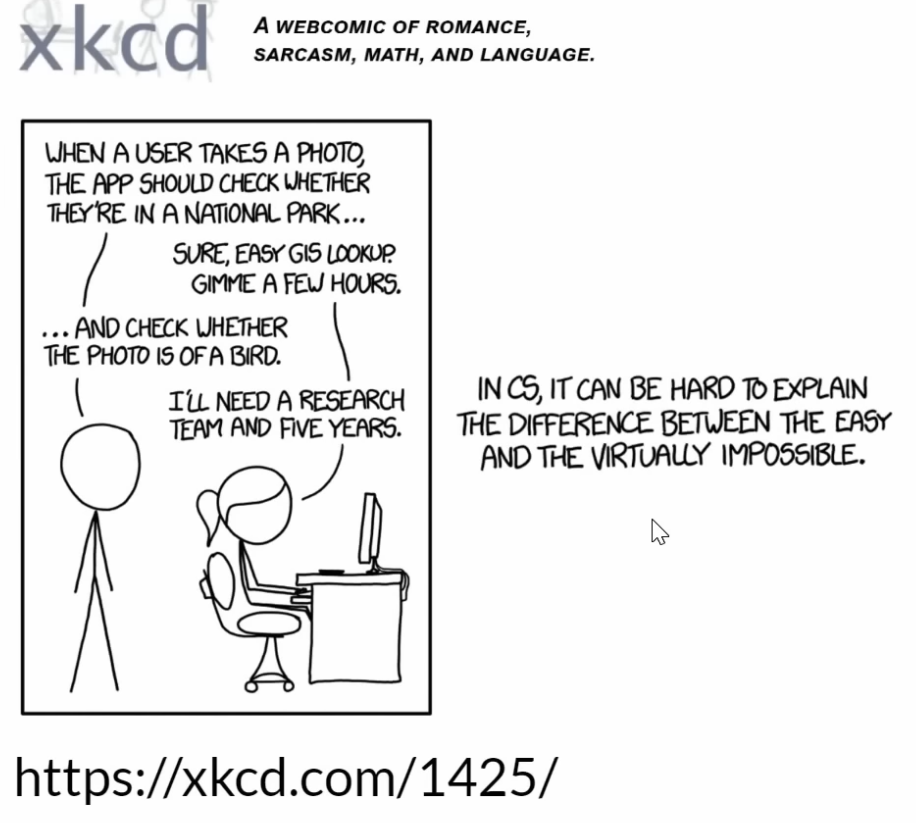
In 2015, nearly impossible to recognize a bird with CS. And Jeremy doing that in 2 minutes ;)

Recent progress

After this brief demonstration, Jeremy shared what he remmbers about recent progress in AI such as:

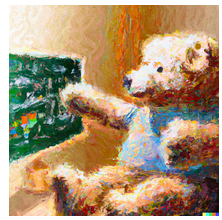
  • artworks: Dall-e, midjourney to create images from text

  • explaining jokes: Google Pathways Language Model (PaLM) to explain jokes or run mathematical proof

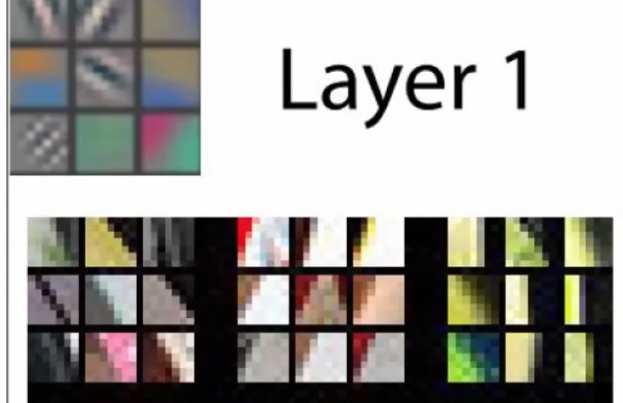
Self learning of features

Then classical but nice explanation that NN learns features (features are not given or coded) and illustrates that with Matt Zeiler and Rob Fergus works

image.png

Vision can be used in many different ways

And it is of course used to classify images, but all these techniques can be combined out of this field for example:

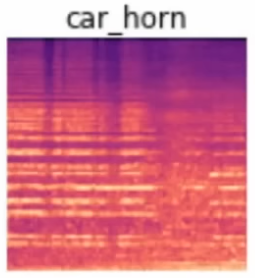
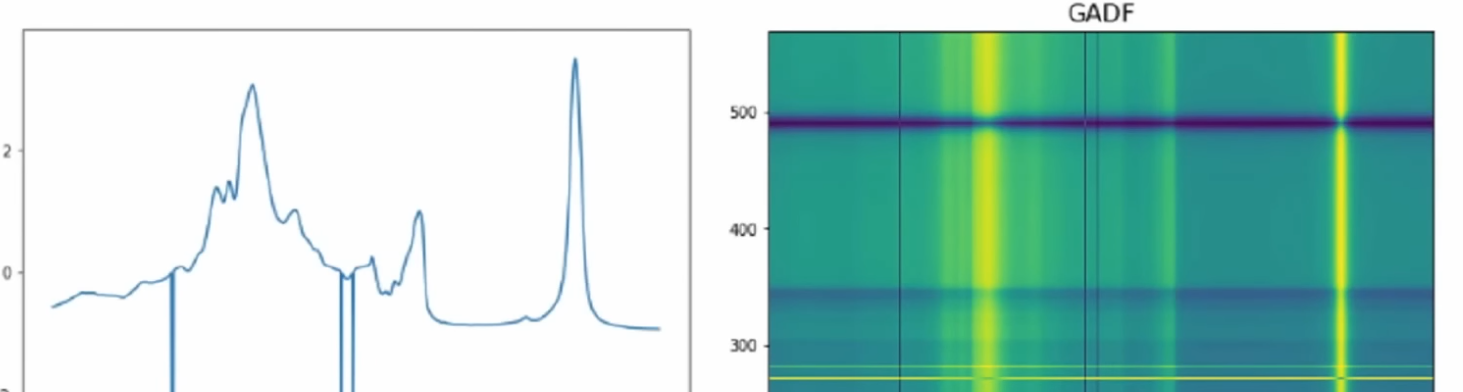
  • recognize sound by transforming sound waves into pictures (Ethan Sutin)

image.png

image.png

image.png

Tools - pytorch, jupyter notebooks, kaggle

For this course Jeremy suggests to use the kaggle cloud server.

If using someone else notebook, just upvote and click Copy & Edit

https://www.kaggle.com/code/guillaumeramelet/jupyter-notebook-101/edit

And now some hands-on starting with Is it a bird? notebook.

And aside note: Jeremy is running all the presentation through Jupyter notebook and RISE

It’s a good idea to ensure you’re running the latest version of any libraries you need.

!pip install -Uqq libraries upgrades to the latest version of libraries (fastai for example)

Going through this “is it a bird?” notebook

Jeremy shares best practices and steps

Such as viewing your data between each steps

Jeremy uses a lot of functional programming it is why we see things like map used a lot.

DataBlock

Using Datablocks API

To train a model, we’ll need DataLoaders, which is an object that contains a training set (the images used to create a model) and a validation set (the images used to check the accuracy of a model – not used during training). In fastai we can create that easily using a DataBlock, and view sample images from it:

And Jeremy explains the logic between the 5 arguments needed to create a DataBlock:

  • blocks: tupple with type of inputs and output

  • get_items: to get all data, here it points to a function to get list of image fileS

  • splitter: method to split between training set and validation set

  • get_y: to kown labels, here it is a function

  • item_tfms: which transformation to apply

And from a DataBlock you create dataloaders (dls) provding (path for images; and bs (batch size))

learners

This is a key part.

Learners are taking 3 arguments: dataloaders, model, metric

And vision models can be from timm.

Here we train a pre-trained model, which is called fine_tune and we do it on 3 epochs.
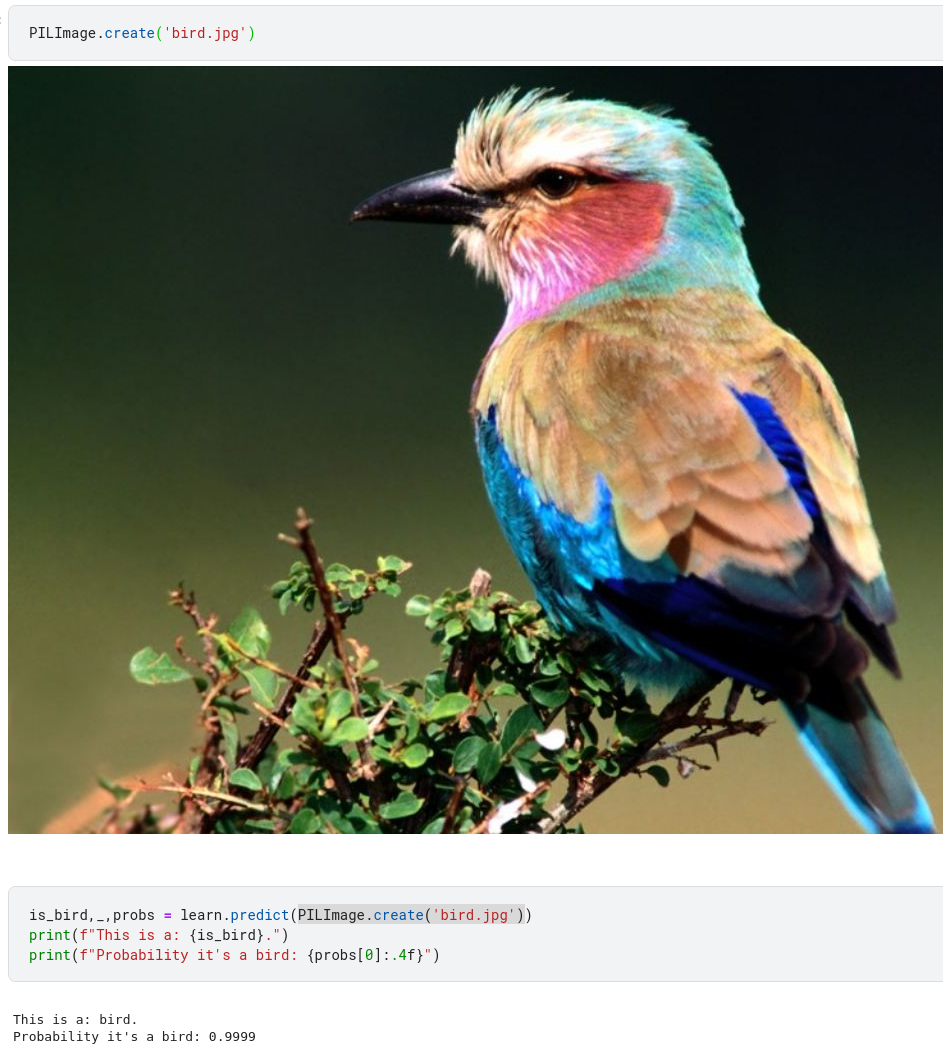
predict

Just providing an item to lean.predict will return label, tensor value, probability

And it is why we have such outputs

image.png

and beyond image recognition
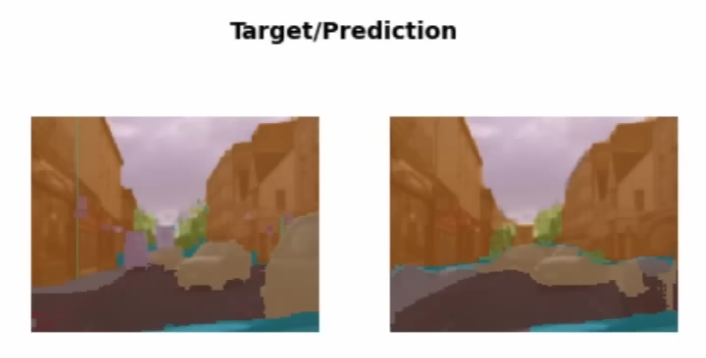
Segmentation

image.png

And here we don’t have datablock but direclty dataloaders

Tabular analysis

Here again no need for DataBlock but a direct use of TabularDataLoaders

image.png

And the tabular_learner wich takes dls and metric.

Collaborative filtering (recommandation system)

Lesson 2 - Deployment

image.png

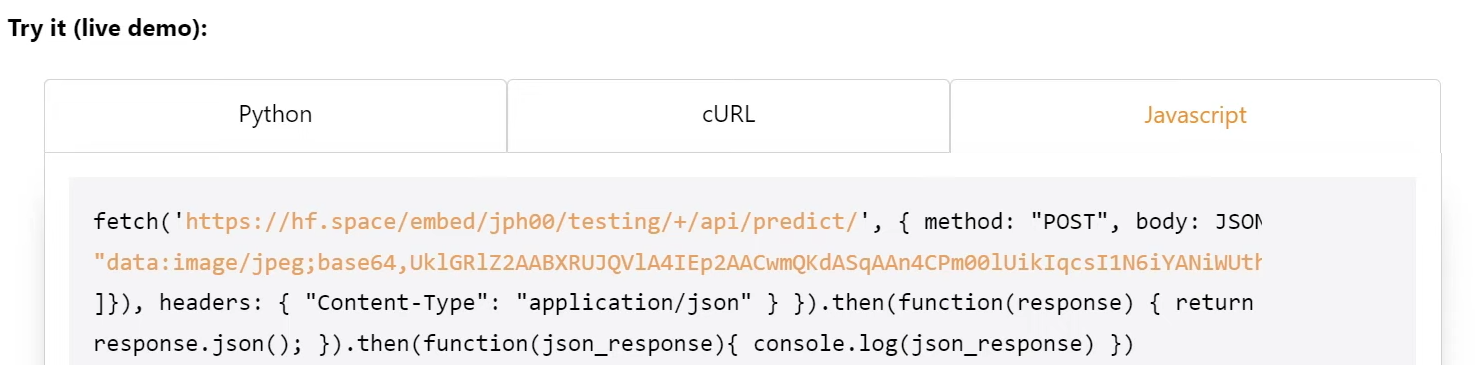
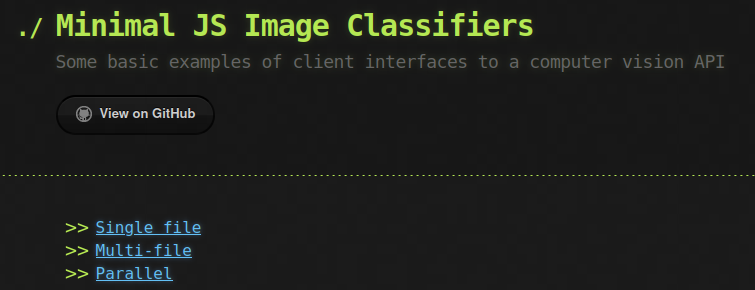
Today you’ll be designing your own machine learning project, creating your own dataset, training a model using your data, and finally deploying an application on the web. We’ll be using a particular deployment target called Hugging Face Space with Gradio, and will also see how to use JavaScript to implement an interface in the browser. Deploying to other services will look very similar to the approach you’ll study in this lesson.

https://course.fast.ai/Lessons/lesson2.html

In this lesson we will use gradio + huggingface spaces.

Jeremy starts by training a vision classifier and use this 1st model to clean labels using ImageClassifierCleaner

This is not specific to vision.

Gradio + HuggingFace Spaces

create HF repo

Create this minima space from HF.

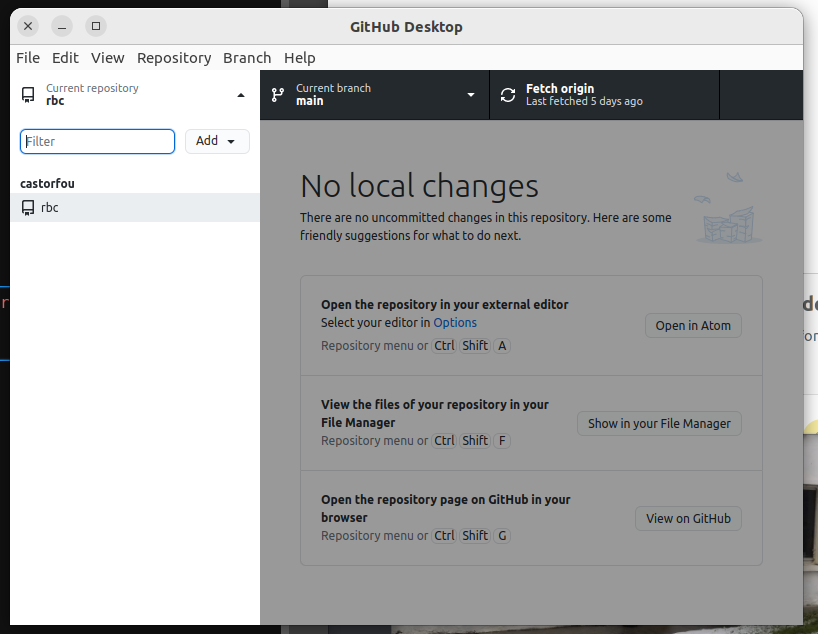
Aside the explanation on HF, Jeremy shares how useful Github Desktop is.

image.png

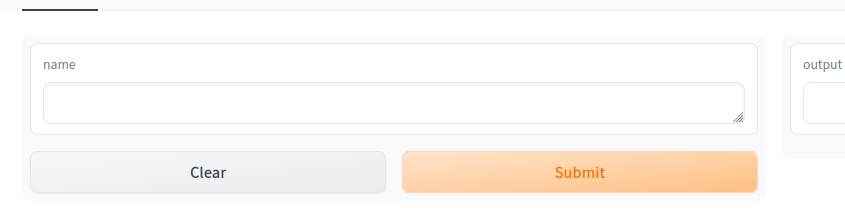
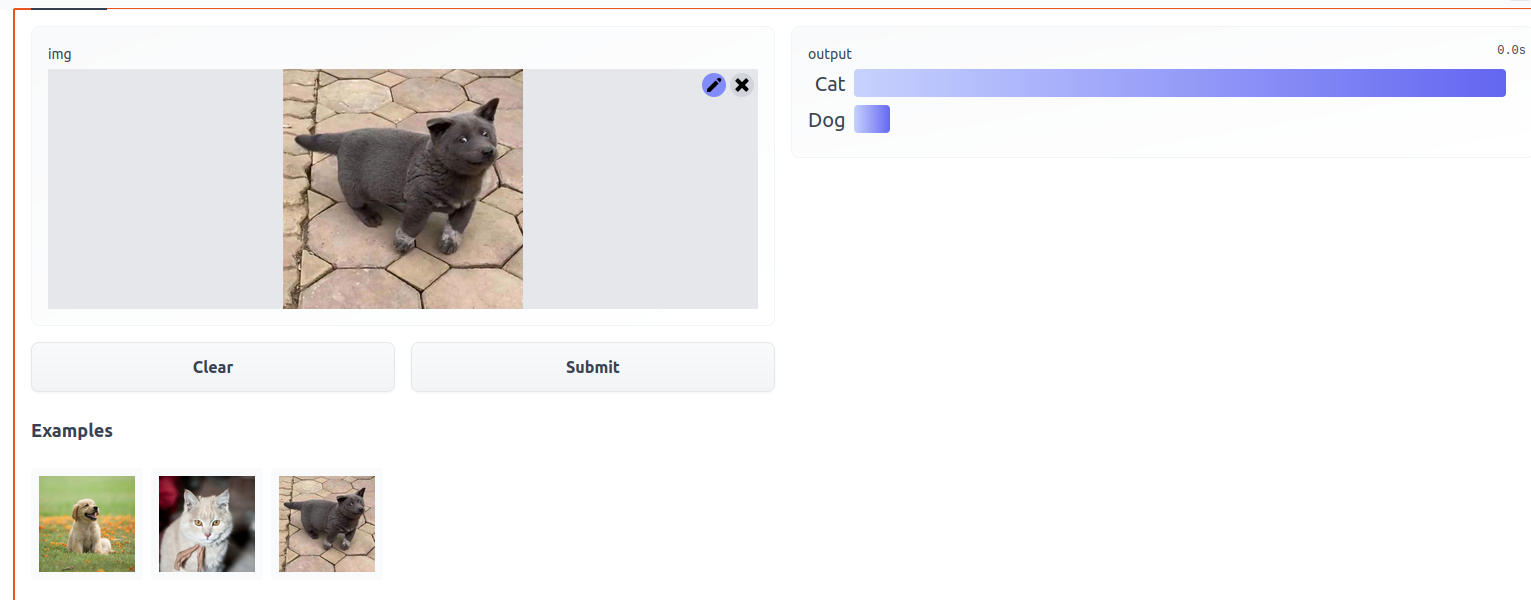
create 1st gradio app and host it

Create app.py as instructed in our freshly created HF space. Commit Push (using github desktop). Back to HF interface, something is being built. and voila

image.png

Nothing new because I played with gradio and HF couple of weeks ago.

We know have a basic app hosted. We can just integrate a deep learning model.

train and export a DL model

And for that Jeremy has setup something on kaggle

They key (and new) part here is

learn.export('model.pkl')

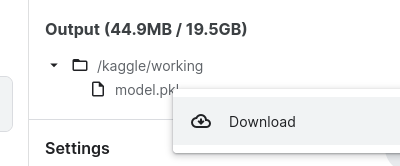
Finally, open the Kaggle sidebar on the right if it’s not already, and find the section marked “Output”. Open the /kaggle/working folder, and you’ll see model.pkl. Click on it, then click on the menu on the right that appears, and choose “Download”. After a few seconds, your model will be downloaded to your computer, where you can then create your app that uses the model.

image.png

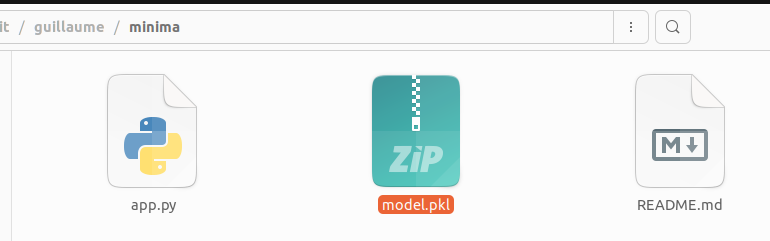
And copy/past it to your local minima repo. Push it to HF.

integrate it with gradio

image.png

And Jeremy illustrates how to do it with a notebook and nbdev. Exactly as I did in gradio and huggingface - handson

load model

Main parts are to load the model with

learn = load_learner('model.pkl')

run prediction

to run a prediction with

pred, idx, probs = learn.predict(img)

call prediction through a function

and to create the classify_image function as expected by gradio

categories = ('Dog', 'Cat')

def classify_image(img):
    pred, idx, probs = learn.predict(img)
    return dict(zip(categories, map(float, probs))))

and this return part is quite complex because gradio cannot deal with Tensors.

create gradio UI

There is now the gradio interface that takes image and returns dictionary.

image = gr.inputs.Image(shape=(192, 192))
label = gr.outputs.Label()
examples = ['dog.jpg', 'cat.jpg', 'dunno.jpg']

intf = gr.Interface(fn=classify_image, inputs=image, outputs=label, examples=examples)
intf.launch(inline=False)

export as app.py

And export as app.py and for that Jeremy uses a slightly different version that I used

Mine;

import nbdev; nbdev.export.nb_export('app.ipynb', lib_path='.')

His:

from nbdev.export import notebook2script
notebook2script('app.ipynb')

https://huggingface.co/spaces/jph00/testing

image.png

fastsetup

https://github.com/fastai/fastsetup

clone it with github desktop (will do cmd line I don’t have the option Jeremy has)

install conda mamba (if needed)

./setup-conda.sh

install fastai from scratch

conda create -n fastai python=3.9
conda activate fastai
conda install -c fastchan fastai nbdev
pip install gradio

update to up-to-date versions

conda activate fastai
conda update -c fastchan fastai nbdev
pip install -U gradio

API

gradio, streamlit

2 options within HF to build app:

  • gradio. Lot of widgets, reasonably flexible to allow prototyping.
  • streamlit. More flexible. Not so easy to start with.

gradio, hf API

and with gradio + HF you have automatically an API available image.png

By clicking it you get the documentation of this API.

It can then be used by any JS interface you would like to develop.

And HF is nice enought to provide examples (live demo) in Python, curl (command line) and javascript

image.png

example from js

Jeremy uses this to develop a small JS interface in https://fastai.github.io/tinypets/1single.html

And the code is quite minimum: https://github.com/fastai/tinypets/blob/master/1single.html

---
title: 1. Single file
layout: page
---

<input id="photo" type="file">
<div id="results"></div>
<script>
  async function loaded(reader) {
    const response = await fetch('https://hf.space/embed/jph00/pets/+/api/predict/', {
      method: "POST", body: JSON.stringify({ "data": [reader.result] }),
      headers: { "Content-Type": "application/json" }
    });
    const json = await response.json();
    const label = json['data'][0]['confidences'][0]['label'];
    results.innerHTML = `<br/><img src="${reader.result}" width="300"> <p>${label}</p>`
  }
  function read() {
    const reader = new FileReader();
    reader.addEventListener('load', () => loaded(reader))
    reader.readAsDataURL(photo.files[0]);
  }
  photo.addEventListener('input', read);
</script>

GH pages

It can run locally of course, and can be hosted with gh pages.

by generating from fastpages

Jeremy suggests to use fastpages. In the doc at the bottom there is a link to generate a website from fastapages

fastai/fastpages: An easy to use blogging platform, with enhanced support for Jupyter Notebooks.

Setup Instructions

  1. Generate a copy of this repo by clicking on this link. Make sure to sign in to your account, or you will see a 404 error. Name your repo anything you like except {your-username}.github.io.

Apply a theme (to be setup in _config.yml)

Create an index.md file which is the landing page.

or by forking an existing one (e.g. tinypets)

and in that case we have to turn on gh pages

Settings > Pages > Enable gh pages (select branch and save)

We can now switch to different theme.

From remote_theme: daviddarnes/alembic@main to remote_theme: pages-themes/hacker

it provides a complete different look

image.png

Looks like we can browse through these jekyll themes at http://jekyllthemes.org/

Lesson 3 - Neural net foundations

image.png

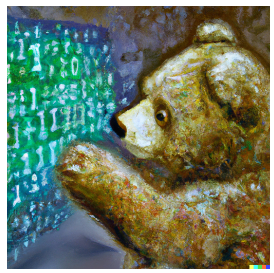
Today we’ll be learning about the mathematical foundations of deep learning: Stochastic gradient descent (SGD), and the flexibility of linear functions layered with non-linear activation functions. We’ll be focussing particularly on a popular combination called the Rectified linear function (ReLU).

https://course.fast.ai/Lessons/lesson3.html

Jeremy mentions Lesson Zero which is more about the way he teaches to learn these things. and recommened process to be run by students.

On this lesson, Jeremy uses paperspace gradient. Which offers full machine with jupyter environments.

timm

To use it we have to install it: pip install timm

Jeremy illsutrates how to switch model architecture. And for that uses timm fastai. He has created a notebook on kaggle to rank vision models https://www.kaggle.com/code/jhoward/which-image-models-are-best/

image.png

Convnext models seem to be a good fit.

import timm

timm.list_models('convnext*')
['convnext_atto',
 'convnext_atto_ols',
 'convnext_base',
 'convnext_base_384_in22ft1k',
 'convnext_base_in22ft1k',
 'convnext_base_in22k',
 'convnext_femto',
 'convnext_femto_ols',
 'convnext_large',
 'convnext_large_384_in22ft1k',
 'convnext_large_in22ft1k',
 'convnext_large_in22k',
 'convnext_nano',
 'convnext_nano_ols',
 'convnext_pico',
 'convnext_pico_ols',
 'convnext_small',
 'convnext_small_384_in22ft1k',
 'convnext_small_in22ft1k',
 'convnext_small_in22k',
 'convnext_tiny',
 'convnext_tiny_384_in22ft1k',
 'convnext_tiny_hnf',
 'convnext_tiny_in22ft1k',
 'convnext_tiny_in22k',
 'convnext_xlarge_384_in22ft1k',
 'convnext_xlarge_in22ft1k',
 'convnext_xlarge_in22k']

And to use one it is just a matter of calling

learn = vision_learner(dls, 'convnext_tiny_in22k', metrics=error_rate).to_fp16()

Using in an app

When dealing with categories, fastai keep category names in the dataloader under vocab

categories = learn.dls.vocab

def classify_image(img):
    pred, idx, probs = learn.predict(img)
    return dict(zip(categories, map(float, probs)))

Applying this on my own app: cheeses

All notebooks from these courses are at https://github.com/fastai/course22

And my app is at https://huggingface.co/spaces/Guillaume63/cheeses

I had to configure this repo to use git-lfs to store large binary files:

git lfs install
#if needed reset the last commit
git reset --soft HEAD^
git status
#if offeneded files ar already staged, restore them
git restore --staged *.jpg
git status
#add them back
git add -A
#check they are managed by git lfs
git lfs ls-files
git commit -am'recommit after lfs install'
git push

and I pushed it to fastai forum

Inside NN

https://www.kaggle.com/code/jhoward/how-does-a-neural-net-really-work

Illustration of a powerfull python function partial

from functools import partial
def mk_quad(a, b, c): return partial(quad, a, b, c)
f = mk_quad(3,2,1)
f(1.5)
10.75

I think I will reuse that!

Jeremy explains NN in 3 steps:

  • loss caculation (with nice simulator to manually approach better paameters)
  • grad calculation, adjustment (with learning rate) and loop
  • we can use combination of relu to be as close as possible to any function (whatever the dimension)

Using Microsoft excel

This is fun. Not as surpising as the one from 3-4 years ago but Jeremy is very good at explaining it. Excel spreadsheet is here.

Next lesson

Will practice nlp using huggingface api.

Lesson 4 - Natural Language (NLP)

https://course.fast.ai/Lessons/lesson4.html

image.png

It’s time for us to learn how to analyse natural language documents, using Natural Language Processing (NLP). We’ll be focusing on the Hugging Face ecosystem, especially the Transformers library, and the vast collection of pretrained NLP models. Our project today will be to classify that similarity of phrases used to describe US patents. A similar approach can be applied to a wide variety of practical issues, in fields as wide-reaching as marketing, logistics, and medicine.

Jeremy is using this notebook Getting started with NLP for absolute beginners on kaggle. As usually upvote & copy/edit to start using it.

Didn’t know that pandas author Wes McKinney has released (free) a book Python for Data Analysis explaining how to use it brillantly.

At the time of the training (May/2022), HuggingFace had 44k models. Today (November/2022) it has 86k models. Huge!

We use dataset library from HF.

Jeremy explains then validation set. And points to some article from Rachel Thomas explaining how to create a good one.

And another one from Rachel Thomas explaining how tricky can be proxy metrics: The problem with metrics is a big problem for AI

Lesson 5 - From-scratch model

https://course.fast.ai/Lessons/lesson5.html

image.png

Today we look at how to create a neural network from scratch using Python and PyTorch, and how to implement a training loop for optimising the weights of a model. We build up from a single layer regression model up to a neural net with one hidden layer, and then to a deep learning model. Along the way we’ll also look at how we can use a special function called sigmoid to make binary classification models easier to train, and we’ll also learn about metrics.

We start from a kaggle notebook from jeremy’s profile which is Linear model and neural net from scratch. As usually upvote & copy/edit to start using it. Or get the notebooks from github.

Today I will use the local version.

linear model then deep learning model

Just restarting from titanic dataset and exactly as what was made in excel, now we do it with PyTorch.

It is good to see how much fiddling it requires. This is good to develop intuititions but defintely it is not what you want to implement when exploring a question.

Why you should use a framework

It is in kaggle Why you should use a framework. As usually upvote & copy/edit to start using it. Or get the notebooks from github.

Jeremy used TabularPandas, lr_find, ensemble

learn.lr_find(suggest_funcs=(slide, valley))
SuggestedLRs(slide=0.0831763744354248, valley=0.007585775572806597)

I could try this for autoencoders: https://alanbertl.com/autoencoder-with-fast-ai/ (this is v1 but should be easy to adapt to v2)

And then ends with How random forests really work. Or get the notebooks from github.

Tip: pd.options.display.float_format = '{:.2f}'.format will display all floats from dataframes with 2 digits

Tip2: from fastai.imports import * will import everything that we need (numpy, pandas, matplotlib, …)

Jeremy illustrates binary split and mentions OneR classifier (paper from 1993)

Lesson 6 - Random forests

https://course.fast.ai/Lessons/lesson6.html

image.png

Random forests started a revolution in machine learning 20 years ago. For the first time, there was a fast and reliable algorithm which made almost no assumptions about the form of the data, and required almost no preprocessing. In today’s lesson, you’ll learn how a random forest really works, and how to build one from scratch. And, just as importantly, you’ll learn how to interpret random forests to better understand your data.

We continue on the previous notebook How random forests really work.

And repeating binary split on 2 dataset already split makes it a TwoR approach… And we can continue recursively. This is what a DecisionTree is.

draw_tree(m, trn_xs, size=10)

Then Jeremy explains different ensemble approached: - by subsetting rows (and columns) and averaging predictions - this is bagging and random forest is one implementation - by focusing on residuals on each steps and summing predictions - this is boosting and gradient boosting decision trees is one implementation. Jeremys’explanation at explained ai

And he mentions feature importance, dependency plot, waterfall plots, oob errors, and other stuff from book chapter 9.

And then Jeremy illustrates with a kaggle competition about rice quality. This is in 08-first-steps-road-to-the-top-part-1.ipynb in github

As always I have to accept conditions before being able to download this dataset

image.png

There are 6 videos (walkthrough) from Jeremy, I think 6 hours long to enter into each detail of his process to be a kaggle grandmaster.

Not so bad top80% within a couple of minutes (of running). It would have taken me days to write such a notebook.

And step 2 happens in 09-small-models-road-to-the-top-part-2.ipynb in github

Where Jeremy changes from resnet26d to convnext_small using The best vision models for fine-tuning.(in collaboration with Thomas Capelle ;) )

And introduces TTA (tranformation at inference time and take avergae of it)

Lesson 7 - Collaborative filtering

https://course.fast.ai/Lessons/lesson7.html

image.png

You interact nearly every day with recommendation systems—algorithms which guess what products and services you might like, based on your past behavior. These systems largely rely on collaborative-filtering, an approach based on linear algebra that fills in the missing values in a matrix. Today we’ll see two ways to do this: one based on a classic linear algebra formulation, and one based on deep learning.

Next is in 10-scaling-up-road-to-the-top-part-3.ipynb in github

This is about dealing with GPU memory management and training with less memory (and adjusting batch size in a smart way (combined with gradient accumulation))

In fastai, it is done with image.png

you adjust bs and use callback with GradientAccumulation

Last part is about collaborative filtering and it is quite identical to subsequent book chapter. Notebook is at kaggle https://www.kaggle.com/code/jhoward/collaborative-filtering-deep-dive/notebook

image.png

Jeremy explains latent factor, the way to implement them in pytorch. Then bias factor added to these matrices to adjust bias. ProductBias to calculate similarity. And the full learning process. Then introduces weight decay as a way to regularize (avoid overfitting).

There is a chapter on interpreting Embeddings and Biases but Jeremy has not gone through it.

Lesson 8 - Convolutions (CNNs)

https://course.fast.ai/Lessons/lesson8.html

image.png

Today we finish off our study of collaborative filtering by looking closely at embeddings—a critical building block of many deep learning algorithms. Then we’ll dive into convolutional neural networks (CNNs) and see how they really work. We’ve used plenty of CNNs through this course, but we haven’t peeked inside them to see what’s really going on in there. As well as learning about their most fundamental building block, the convolution, we’ll also look at pooling, dropout, and more.

First part is continuing collaborative filtering. Notebook is at kaggle https://www.kaggle.com/code/jhoward/collaborative-filtering-deep-dive/notebook

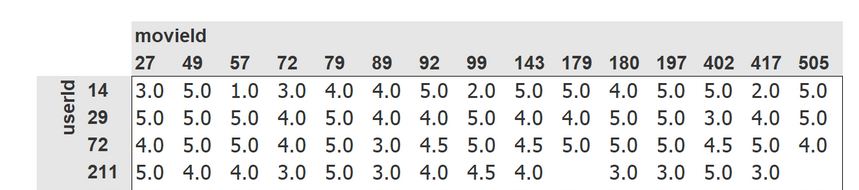
It starts with embeddings and bias and interpretation. Jeremy shows how to visualize bias (which movies are most liked (even by people usually not liking this kind of movies) and disliked) or from a user perspective (which users tend to like all movies or dislike alkl movies)

And to visualize embeddings (thanks to a PCA) to understand which kind of movies we have. (and could be which kind of users we have)

I am re-running from start. As adviced it is good to restart https://www.kaggle.com/code/jhoward/linear-model-and-neural-net-from-scratch/comments#2062682

I like the progressivity here: linear model, then matrix product, then neural network with 2 hidden layers. All of this using basic PyTorch pieces (tensors, multiplication, gradient calculation, …) but nothing about Module

And then the second step is from fastai book available at https://github.com/fastai/fastbook/blob/master/08_collab.ipynb to explore Module.

At the end of Lesson 8 - Practical Deep Learning for Coders 2022, Jeremy suggests to read Meta Learning from Radek (https://radekosmulski.com/)

image.png