install ubuntu 18.04 on WSL and then evalai
could be useful to install evalai
source of inspiration
Installation ubuntu-18.04
uninstall image (if needed)
# wsl --unregister <distroName>
wsl --unregister ubuntu-18.04
download images
From cloud images ubuntu (cloud-images > bionic> current), now there are wsl images:
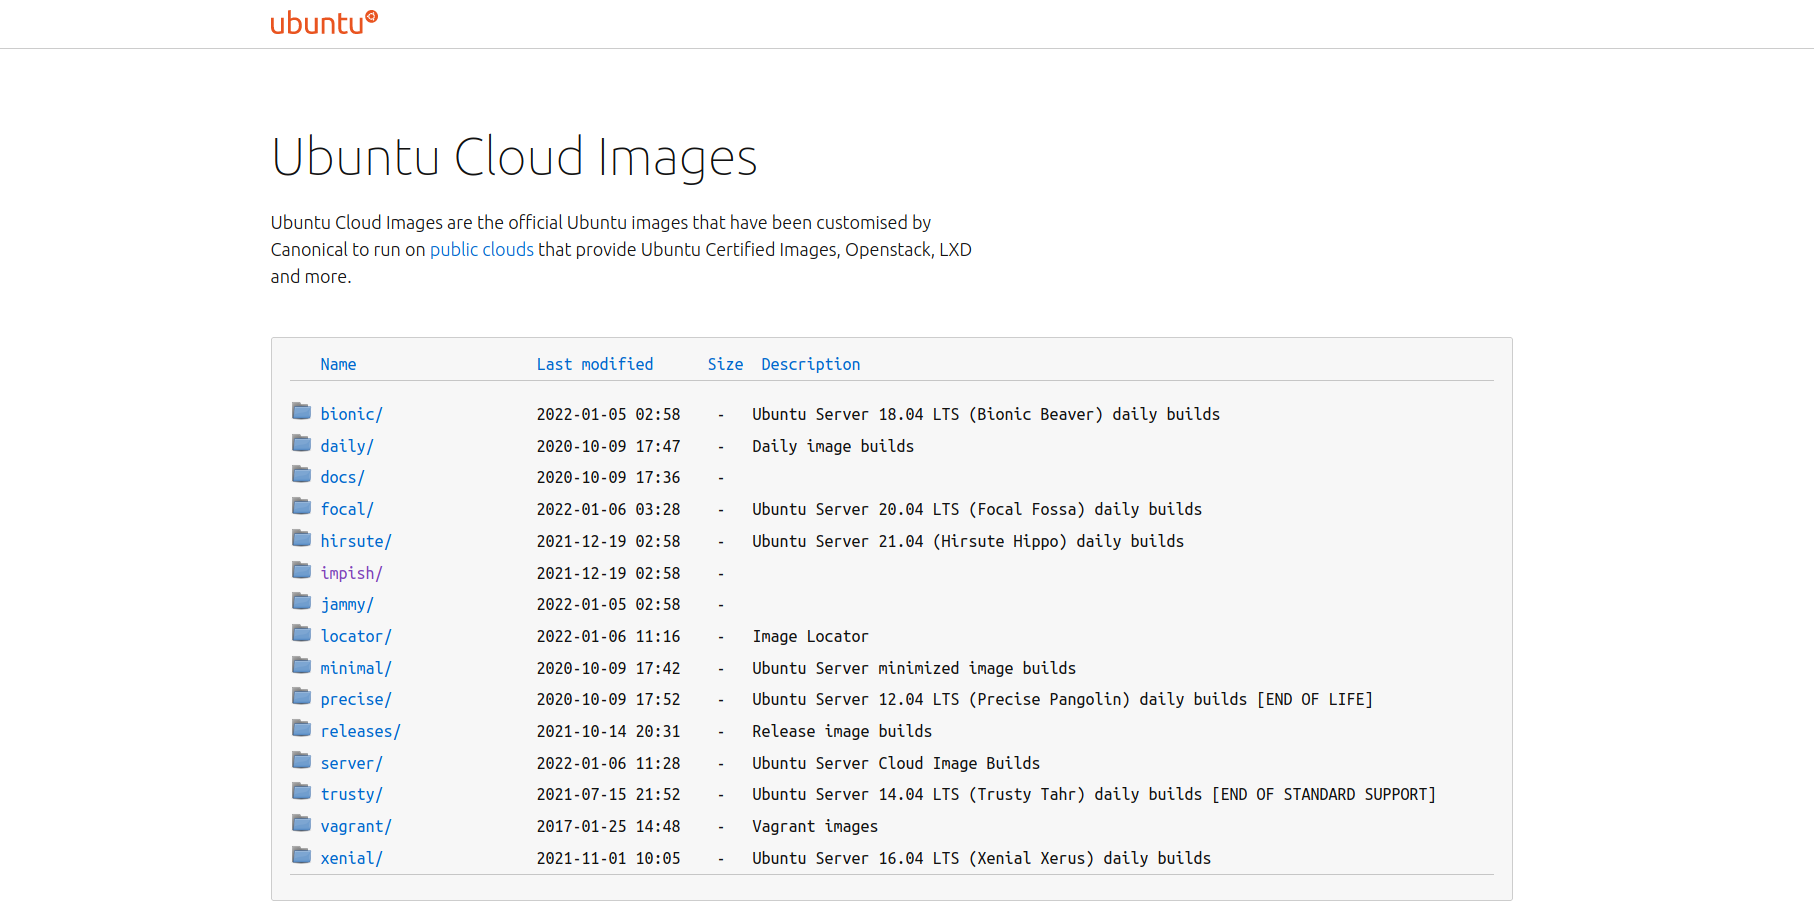
I just have to download the last bionic (18.04) image bionic-server-cloudimg-amd64-wsl.rootfs.tar.gz
install and setup from powershell
I have downloaded this ubuntu image to D:\wsl\ubuntu-18.04\download
(base) guillaume@LL11LPC0PQARQ:/mnt/d/wsl$ tree
.
├── Ubuntu-20.04
│   └── ext4.vhdx
├── Ubuntu-22.04
│   ├── download
│   │   └── jammy-server-cloudimg-amd64-wsl.rootfs.tar.gz
│   └── instance
and my ubuntu-18.04 instance will stand in D:\wsl\ubuntu-18.04\instance
Install with this command from powershell
# wsl --import <distroname> <location of instance> <location of download>
wsl --import ubuntu-18.04 D:\wsl\ubuntu-18.04\instance D:\wsl\ubuntu-18.04\download\bionic-server-cloudimg-amd64-wsl.rootfs.tar.gz
It takes 3-4 minutes to install. and should be visible in your wsl instances.
 wsl --list --all -v
  NAME            STATE           VERSION
  ubuntu-22.04    Stopped         2
then to run it
# wsl -d <distroname>
wsl -d ubuntu-18.04
or
use Windows Terminal as a launcher
Windows Terminal is a smart way to group all terminals (powershell, and all your wsl instances)

It can be installed even with limited windows store access by clicking install in Installer le Terminal Windows et commencer à le configurer
Automatically all wsl instances appear in Settings.
Automatic setup
copy these 2 scripts in /root/ (given they are in D:\wsl\ubuntu-18.04\download)
cp /mnt/d/wsl/Ubuntu-18.04/download/setup_wsl_* .
setup_wsl_root.sh download
#!/bin/bash

echo "0. get username: "
read user_name

. /etc/lsb-release

echo Configuration for user [$user_name]
echo of distribution $DISTRIB_CODENAME
echo

echo "1. create user and add in sudo"
#adduser --disabled-password --gecos "" $user_name
adduser --gecos "" $user_name
usermod -aG sudo $user_name
echo

echo "2. create wsl.conf file"
rm -rf /etc/wsl.conf
tee /etc/wsl.conf << EOF
# Set the user when launching a distribution with WSL.
[user]
default=$user_name
EOF
echo

echo "3. prepare setup by user"
cp setup_wsl_user.sh /home/$user_name
chown $user_name:users /home/$user_name/setup_wsl_user.sh
chmod 750  /home/$user_name/setup_wsl_user.sh
tee -a /home/$user_name/.bashrc << EOF
if [ ! -e ".wsl_configured" ]; then
		./setup_wsl_user.sh
        touch .wsl_configured
fi
EOF
echo

echo "end of configuration for root"
echo "stop wsl instance by running 'wsl -t <distro-name>' from powershell"
echo "and start from Windows Terminal"
setup_wsl_user.sh download
#!/bin/bash

echo "1. setup wsl-vpnkit"
if grep -Fxq "wsl-vpnkit" ~/.profile
then
    # code if found
	echo "   wsl-vpnkit already setup"
else
    # code if not found
	echo 'wsl.exe -d wsl-vpnkit service wsl-vpnkit start' >> ~/.profile
fi
wsl.exe -d wsl-vpnkit service wsl-vpnkit start
source ./.bashrc
echo

echo "2. create ssh key to copy to gitlab"
. /etc/lsb-release
if [ ! -e ".ssh/id_rsa.pub" ]; then
		ssh-keygen -t rsa -b 4096 -C "WSL2 ubuntu $DISTRIB_RELEASE"
		cat .ssh/id_rsa.pub
		echo "copy this content to gitlab > preferences > SSH Keys"
		read -p "Press any key to resume ..."
fi
echo

echo "3. update certificates"
git clone git@gitlab.michelin.com:devops-foundation/devops_environment.git /tmp/devops_environment
sudo cp /tmp/devops_environment/certs/* /usr/local/share/ca-certificates/
sudo update-ca-certificates
rm -rf /tmp/devops_environment
if [ $DISTRIB_RELEASE == "22.04" ]
then
echo 'bug SSL with ubuntu 22.04 - https://bugs.launchpad.net/ubuntu/+source/openssl/+bug/1963834/comments/7'
sudo tee -a /etc/ssl/openssl.cnf << EOF
[openssl_init]
ssl_conf = ssl_sect

[ssl_sect]
system_default = system_default_sect

[system_default_sect]
Options = UnsafeLegacyRenegotiation
EOF
fi
echo

echo "4. update apt sources with artifactory"
echo 'Acquire { http::User-Agent "Mozilla/5.0 (X11; Ubuntu; Linux x86_64; rv:13.37) Gecko/20100101 Firefox/31.33.7"; };' | sudo tee /etc/apt/apt.conf.d/90globalprotectconf
sudo sed -i 's,http://archive.ubuntu.com/ubuntu,https://artifactory.michelin.com/artifactory/ubuntu-archive-remote,g' /etc/apt/sources.list
sudo sed -i 's,http://security.ubuntu.com/ubuntu,https://artifactory.michelin.com/artifactory/ubuntu-archive-remote,g' /etc/apt/sources.list
sudo apt update
sudo apt upgrade -y
echo
Then
chmod +x setup_wsl_root.sh
./setup_wsl_root.sh
As explained stop wsl instance by running wsl --shutdown ubuntu-22.04 from powershell
and start from Windows Terminal
It restarts from your user and it will install:
- setup wsl-vpnkit
- create ssh key to copy to gitlab
- update certificates
- update apt sources with artifactory
Installation EvalAI
Step 1: Install prerequisites
- Install git - postgres
sudo apt-get install git postgresql libpq-dev
- install rabbit-mq
sudo apt-get -y install socat logrotate init-system-helpers adduser erlang-base
# download the package
wget https://github.com/rabbitmq/rabbitmq-server/releases/download/v3.10.6/rabbitmq-server_3.10.6-1_all.deb

# install the package with dpkg
sudo dpkg -i rabbitmq-server_3.10.6-1_all.deb
rm rabbitmq-server_3.10.6-1_all.deb
- install python 3.7
sudo apt install python3.7 sudo update-alternatives --install /usr/bin/python python /usr/bin/python3.7 1 sudo update-alternatives --install /usr/bin/python python /usr/bin/python3.6 2 update-alternatives --list python sudo update-alternatives --config python - install virtualenv
# only if pip is not installed
sudo apt-get install python3-pip build-essential
# upgrade pip
pip3 install --upgrade pip
# upgrade virtualenv
pip --trusted-host pypi.org --trusted-host pypi.python.org --trusted-host files.pythonhosted.org install --upgrade virtualenv
source .profile
Step 2: Get EvalAI code
git clone https://github.com/Cloud-CV/EvalAI.git evalai
Step 3: Setup codebase
- Create a python virtual environment and install python dependencies.
#pour curl-config
sudo apt install libcurl4-openssl-dev libssl-dev

cd evalai
virtualenv -p python3.7 venv
source venv/bin/activate

pip --trusted-host pypi.org --trusted-host pypi.python.org --trusted-host files.pythonhosted.org install -r requirements/dev.txt
# issue on django-autofixture
# https://github.com/gregmuellegger/django-autofixture/issues/117
- Rename
settings/dev.sample.pyasdev.py
cp settings/dev.sample.py settings/dev.py
- Create an empty postgres database and run database migration.
createdb evalai -U postgres
# update postgres user password
psql -U postgres -c "ALTER USER postgres PASSWORD 'postgres';"
# run migrations
python manage.py migrate
- For setting up frontend, please make sure that node(
>=7.x.x), npm(>=5.x.x) and bower(>=1.8.x) are installed globally on your machine. Install npm and bower dependencies by running
npm install
bower install